We are your source for energy efficient products and information.
|
Radiant Barrier > Installation > Attic
Installing Radiant Barrier in the Attic
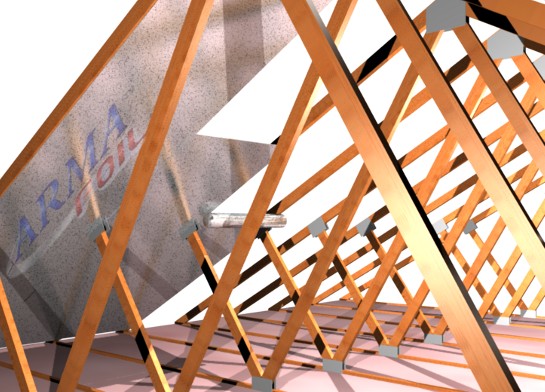
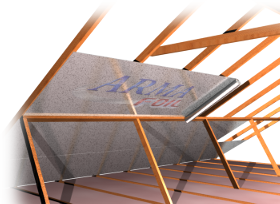
Stapled to roof chords: 
This method is generally considered the best method in cooling dominated areas as it keeps the entire attic space cooler, and blocks radiant heat from hitting ductwork and air handlers located in the attic. In addition, attic air leaked into the return side of the ductwork is at a lower temperature, creating less stress on the cooling equipment and increasing its efficiency. In this location, the foil is generally not affected by dust.
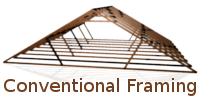
Conventional Framing
- 1. You should use a Perforated Radiant Barrier material (ARMA FOIL™) for attic foil installation.
- 2. In an open framed attic, it is generally easiest to install the strips of radiant barrier roof material across the attic (perpendicular to the direction of the roof joists), overlapping each run by about 2 inches. Unroll the Radiant Barrier, hold in place and staple to bottom of roof joists. Staples should be placed 14 to 18 inches apart.
*new - Our new wider rolls (51" and 25.5") allow for easy radiant barrier installation in the up/down direction also. Many of our commercial customers prefer this method of installation.
- 3. Cut around vertical bracing as necessary. Foil Tape can be used to patch up any slits you make in the foil to fit around these objects.
- 4. Cut a minimum of 2 inch clearance around any exhaust or flue pipes.
- 5. Cut openings in the foil below existing roof vents to allow attic air to vent.
- 6. It is recommended to cover gable end walls as well.
- 7. There is no need to tape all the seams in this type of installation.
Truss Framing
- 1. You should use a perforated material (ARMA FOIL™) for this application.
- 2. In a truss framed attic, it is generally easiest to install the strips of material in line with the trusses. ARMA FOIL™ is available in several different widths to fit your truss spacing (25.5" for 24" o.c. and 17" for 16" o.c.). Unroll the DIY Radiant Barrier, hold in place and staple to bottom of roof joists. Staples should be placed 14 to 18 inches apart.
- 3. Cut around vertical bracing as necessary. Foil Tape can be used to patch up any slits you make in the foil to fit around these objects.
- 4. Cut a minimum of 2 inch clearance around any exhaust or flue pipes.
- 5. Cut openings in the foil below existing roof vents to allow attic air to vent.
- 6. It is recommended to cover gable end walls as well.
- 7. There is no need to tape all the seams in this type of installation.
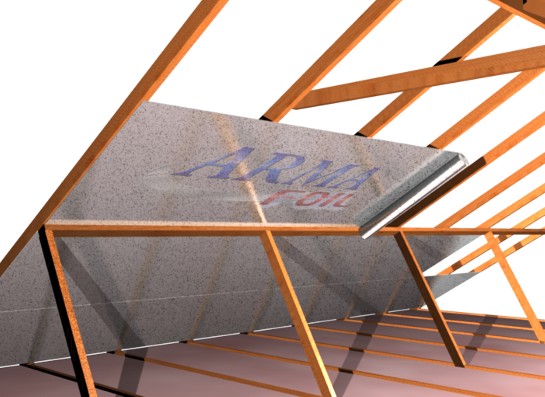
Under the roof decking:

This do-it-yourself radiant barrier method is used primarily in new construction or when replacing roof decking. It works similarly to "Stapling to roof cords", however, is easier to install.
- Perforated material is preferable for this job
- Unroll the Radiant Barrier over the top of the roof trusses or joists
- Allow the material to sag down about 2 inches between each joist
- Periodically staple to hold it in place
- Overlap each run by about 2 inches
- Cut 2" clearance around any exhaust or flue pipes
- Cut openings below roof vents to allow attic air to vent
- It is recommended to cover gable end walls as well
- There is no need to tape all the seams in this type of truss-mounted radiant barrier installation
- Nail roof decking on top as usual
Reflective Sheathing:
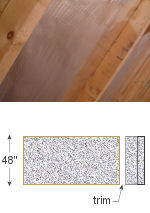
Several companies offer sheathing products with aluminum foil laminated to it. You can make your own reflective OSB sheathing for a fraction of the cost. Just staple our 51" wide foil products to regular OSB or Plywood sheathing.
- Use industrial grade perforated material for this job
- Unroll the 51" wide Radiant Barrier over the sheathing and staple or glue it in place. Leave the 3" extra at the top and will serve to overlap the joint between rows of sheathing when installed.
- Cut the foil off at the end of the sheathing.
- You have just made reflective sheathing or roof decking at a savings.
- When you install it on your roof, face the aluminum side down toward the attic space.
- Cut 2" clearance around any exhaust or flue pipes
- Cut openings below roof vents to allow attic air to vent
- It is recommended to cover gable end walls as well
more about Radiant Barrier sheathing
Proceed to Material Specifications
|